Building a React Portfolio (Part 1)

Welcome back to our series on Simplifying React. If you haven't done so already you can catch up on the previous articles in this series by going to the Simplifying React page.
What are we going to build?
In this part of the series, we are going to get a bit more practical and jump into coding our first React app. I've decided to start with a portfolio project simply because I want to update mine and thought why not build it in React and get a bit more practice? Might be a bit overkill for what is needed but the practice is good.
Follow me on my journey and let's see what we can create together.
Flesh out the idea
Before I start any project I like to get a rough idea of what I want to be the outcome. For my portfolio, I'm going to need an about section, a projects section and a contact section at the very least. From there maybe we can add some testimonials, side projects and maybe a couple of other nice-to-haves to make it more complete.
But for now, let's stick to the basics:
- About
- Projects
- Contact
What about the design?
Three words: clean, simple and maintainable. I don't like to have anything complicated in terms of design. I like to follow the Keep it simple stupid (KISS) principle in a lot of what I do. If something starts to feel too complicated then I won't want to come back later and update it or make changes. Keeping things simple is the best approach for me.
For design inspiration, I tend to spend time on websites like awwwards or dribble to see what other people have created. There is of course also a bit of googling done.
Here are some of the portfolios that caught my eye and I'll be drawing inspiration from:
- https://danielkorpai.com/
- https://brittanychiang.com/
- https://ejosue.com/
- https://mattfarley.ca/
- https://codersblock.com/
You can go into more detail about this process if you'd like and mock up some visuals that you'll work towards, but for this tutorial, we'll just take inspiration from those sites as we go along.
Let's get our tools ready
So before you begin programming we need to make sure we have the right tools installed on our machine.
We will need the following:
- A code editor we are comfortable with. I will be using Visual Studio Code but you can use whatever editor you are comfortable with.
- We will need to install NodeJs
- We will need to create a GitHub account for version control, or any other version control tool you prefer.
Please go through the steps on the links above and get everything downloaded.
That will be enough to get us to the point of completing the portfolio to the point of deploying.
I will be deploying my portfolio at the end of this tutorial, so keep reading to see how to do that. If you want to do the same then you will need some sort of hosting to put your completed portfolio onto.
I use Hostinger to host my sites, but you can use whatever service you prefer. Feel free to use this link to get a 20% discount on your hosting.
Okay! Let's start coding!
At this point, I'm assuming that you've downloaded all the items we mentioned in the previous section. So you should have your code editor installed, NodeJs installed and a GitHub created if you didn't have one from before.
For this tutorial, I'll be using VSCode as my editor but feel free to follow along with your editor of choice.
Let's create a GitHub repo for our portfolio so that we can safely store our code and maintain version control. If you've done this already or know how to do this please feel free to skip ahead.
Creating a GitHub repo
There are several ways of doing this, so find the way that you are most comfortable with. But the easiest way for me is by going directly to GitHub and creating a repo there or via the GitHub desktop app. For this tutorial, I'll be creating it via the GitHub website.
The steps are as follows:
- Log into your GitHub account
- On the left-hand side you have a list of "Recent Repositories", next to which is a "new" button.

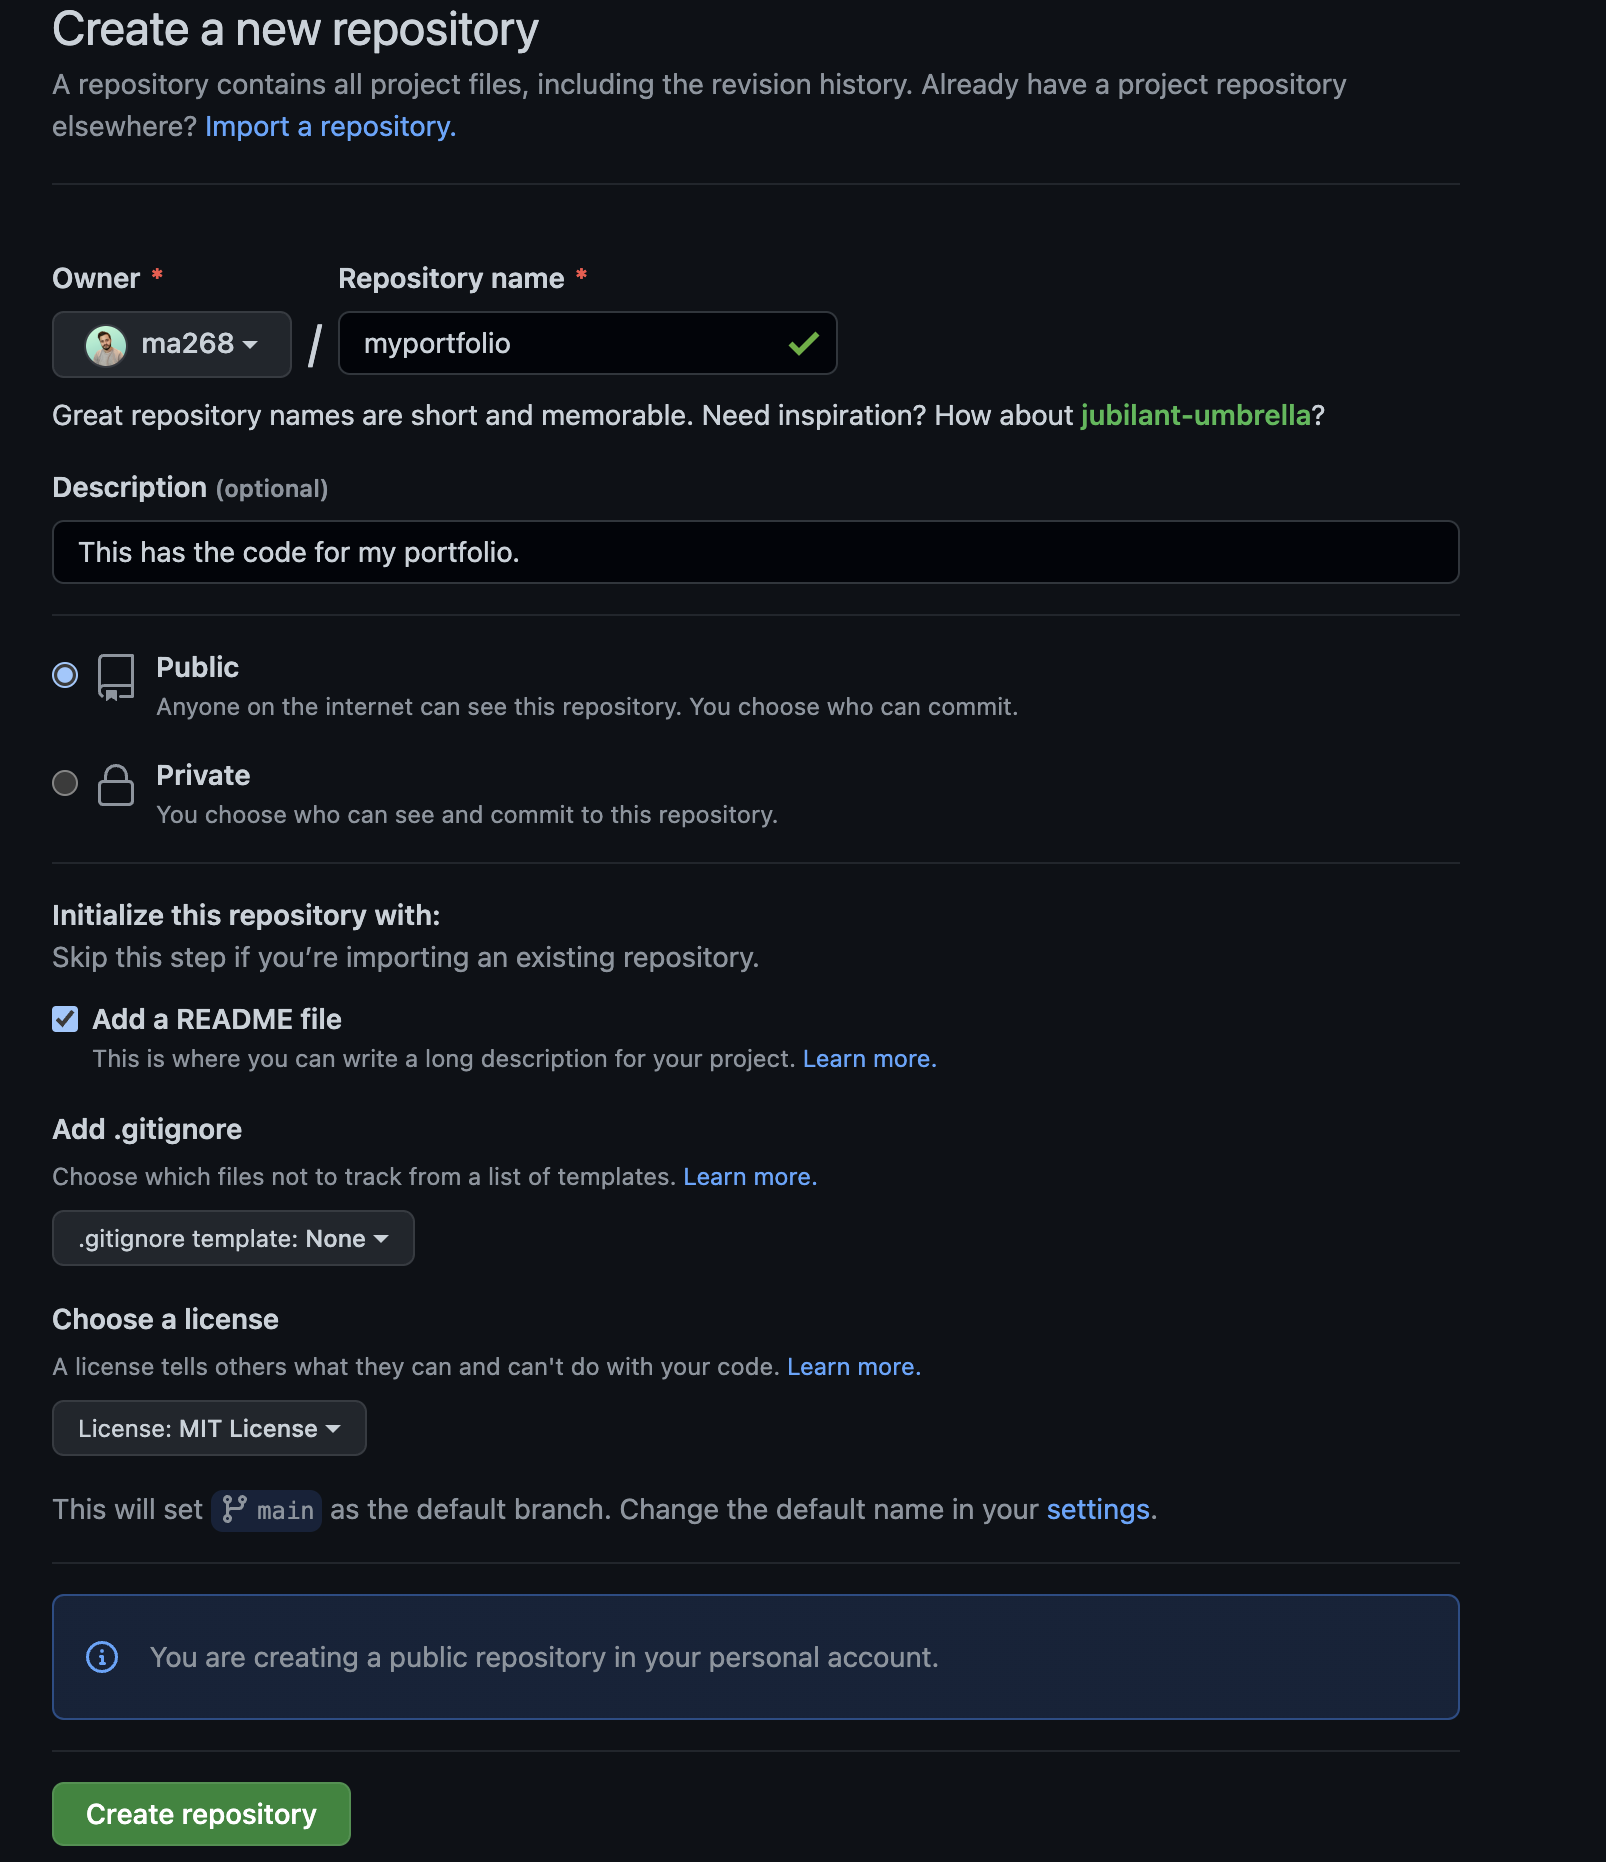
- Click on the new button and you'll be redirected to a page titled "Create a new repository"
- Fill in the fields as you like. The main one you need to worry about is the "Repository Name" field.
- It's also good practice to create a readme file for your repos so people visiting your repo know about the project you're building here and how to run it.
- Adding a .gitignore file will also tell git to ignore specific fields in your directory if you don't want to include them in your repo or monitor their changes. You can use GitIngore.Io to create basic gitingore files for your operating system.
- Once you've populated the fields appropriately you can hit "Create Repository" and that will take you to the new repo page for it.
- Once there we need to clone the repo to our local machine. Again here there are several ways to do this as you can see from the screenshot below. We are going to use the URL by clicking on the green button titled "Code" and copying the URL that's shown.

- Then head over to VSCode and clone the repo by clicking on the "Source Control" button on the left and then clicking on "Clone Repository". Then past the URL that we copied in the previous step in the window that appears and hit enter.
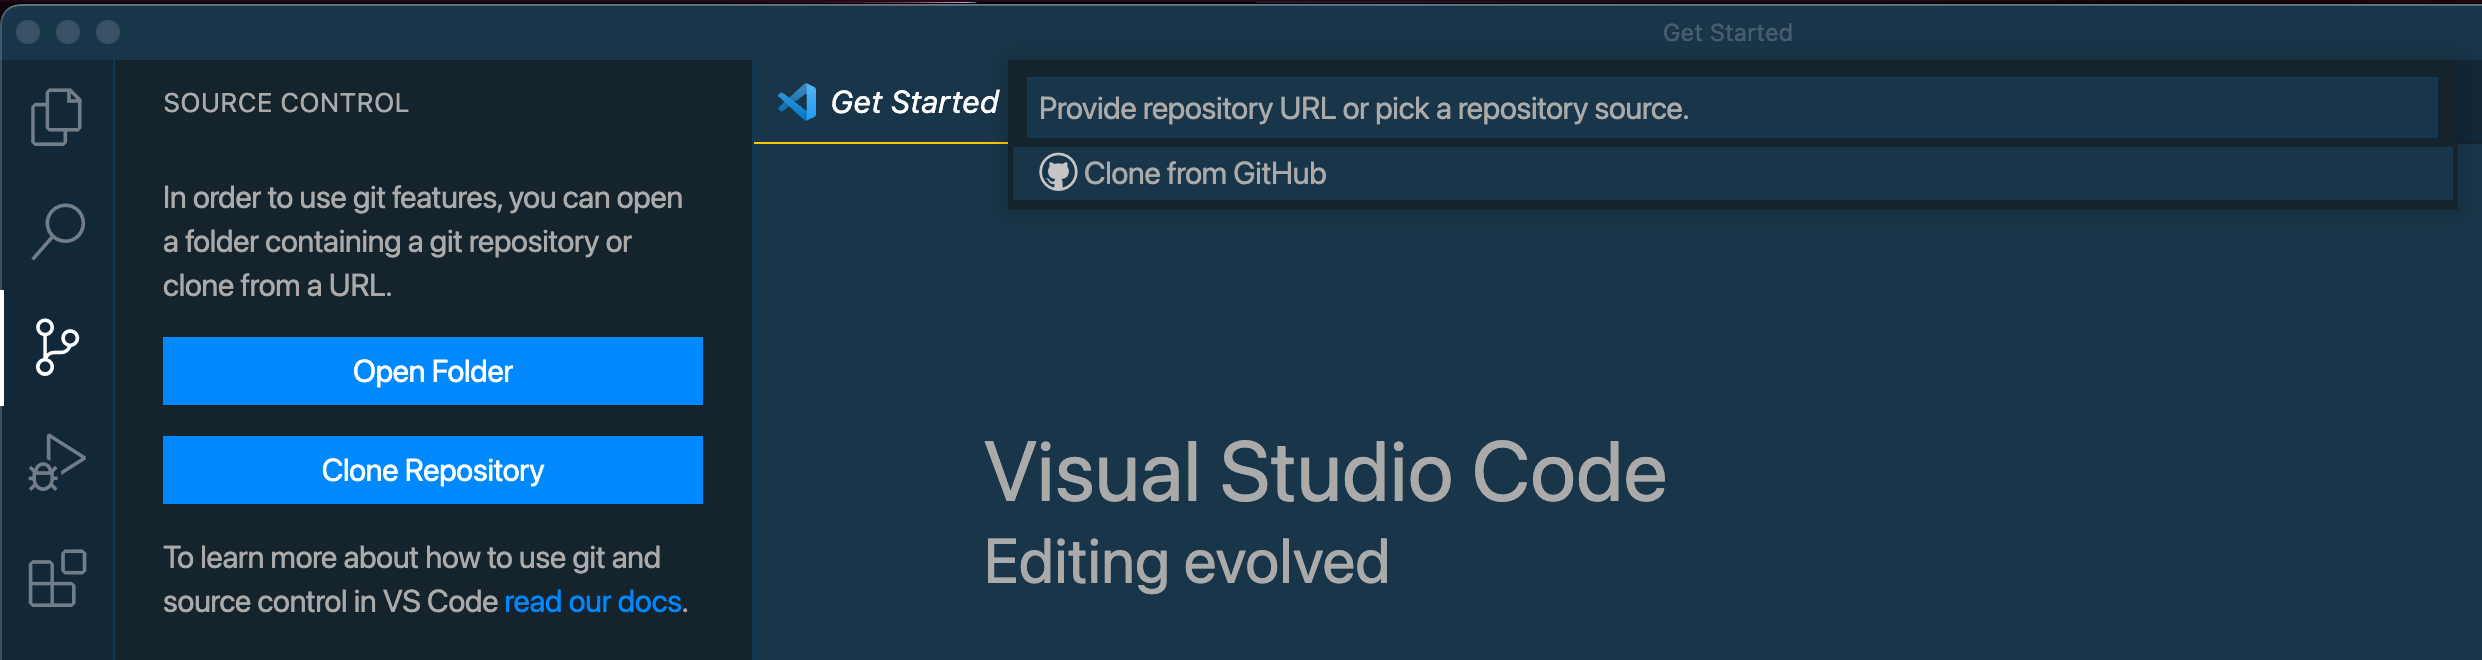
- You will then be prompted to select a location for your repo. The repo should clone to your local and you will be prompted to open your newly cloned repo in VSCode. Click open.
Well done! You've now created your repo and cloned it to your local machine. The next step will be to create a branch for your new work and then create our new react app.
If you know how to create a branch then please skip straight to creating the new react app.
Creating a new branch
Why are we doing this step? This step is important, especially when you are developing as part of a team because it means your work won't interfere with other people's work. And if you make breaking changes then these don't need to be implemented until the team as a whole is ready to use those changes. For this tutorial, you might be working on this project on your own so you won't feel the full benefits of branching, but it's still good practice to get into the habit of doing this early on. Git and GitHub is a topic on their own and we will be diving into it in a bit more detail in future articles, for now, we know enough to get started.
There are again many ways to go about creating a new branch, but for us, we will be using the built-in git management tools in VSCode.
At the bottom left of your VSCode window, you should see that we are currently in the "main" branch.
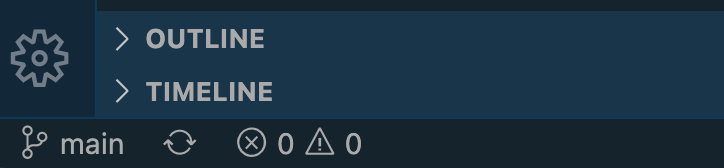
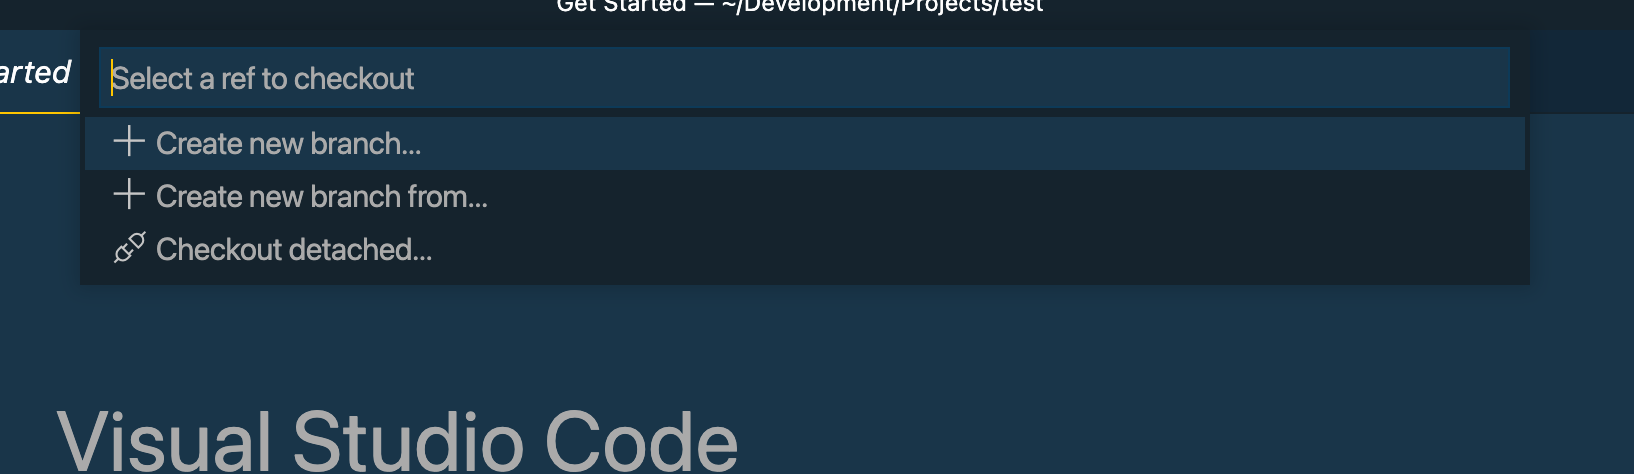
If you click on "main" you will see a new window pop up with the following options:
- Create a new branch
- Create a new branch from
- Checkout detached
We will use create a new branch option.
Once you've clicked on create a new branch you'll be prompted to enter a new branch name and hit enter to confirm. Pick a name that suits you and hit enter.

Great you've now created your branch.
In Part 2 we will create our first react app using create-react-app and then start modifying it to start making our portfolio.
Until next time 😀